
A thread ring gauge can become unreliable before visible damage appears, especially when chips, humidity, heat and rough handling affect its working surfaces. Use the receiving, inspection, cleaning, storage and verification steps below to protect the gauge and keep production decisions traceable.
Key takeaways
- Match the gauge marking, size, pitch and tolerance class to your purchase order.
- Keep GO and NO-GO rings clearly identified before inspection.
- Clean gauges with lint-free cloth and approved rust protection after use.
- Store gauges dry, covered and separated from cutting tools during Pune’s monsoon.
Accept the Gauge Against the Purchase Order
Do not put a newly delivered thread ring gauge into production until its identity, condition and paperwork agree. If you are receiving a thread ring gauge in Pune, apply the same check used with thread ring gauge suppliers anywhere:
1. Compare the engraving with the purchase order and calibration certificate. Confirm nominal diameter, thread form, pitch, tolerance class, GO or NO-GO designation, applicable standard such as ISO 1502 or ASME B1.2, and gauge serial number. Reject a certificate that states only the nominal size; it does not establish traceability or the gauge’s function.
2. Inspect the ring under strong, clean light. Use magnification to find burrs, dents, rust, pitting, flank scoring or damage, peening at the entry, embedded particles, and incomplete or illegible identification. Look for impact marks or distortion showing that the gauge was dropped or forced onto a component.
3. Keep the gauge quarantined if the marking, certificate or physical condition differs from the order. Do not assume two gauges with the same diameter are interchangeable: pitch, tolerance class and GO or NO-GO function change the acceptance decision.
4. Record the receiving date, supplier, certificate number, packaging condition and inspector’s findings. Resolve every discrepancy before release, and obtain corrected documentation or verification when the gauge identity cannot be established from the supplied records.
Identify GO and NO-GO Rings Before Inspection
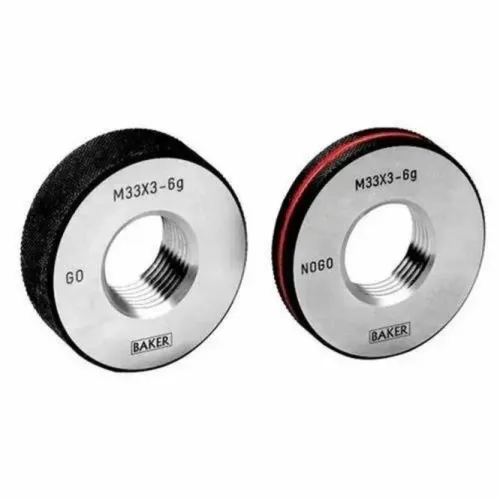
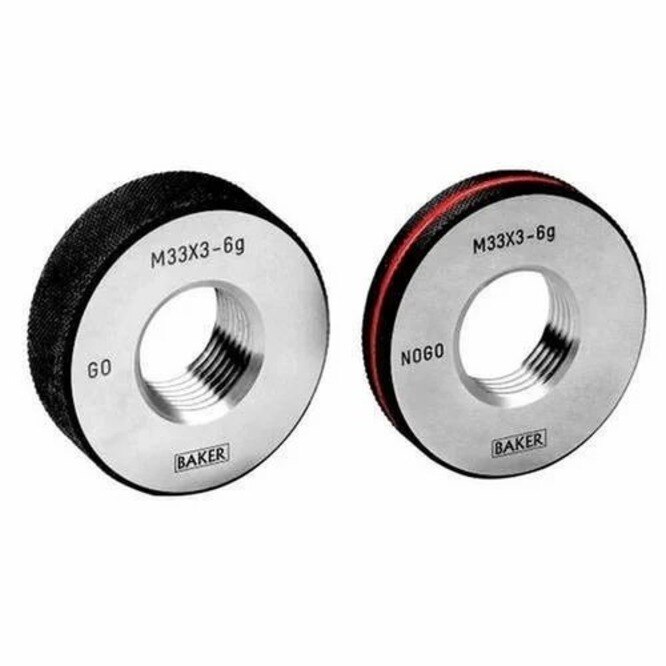
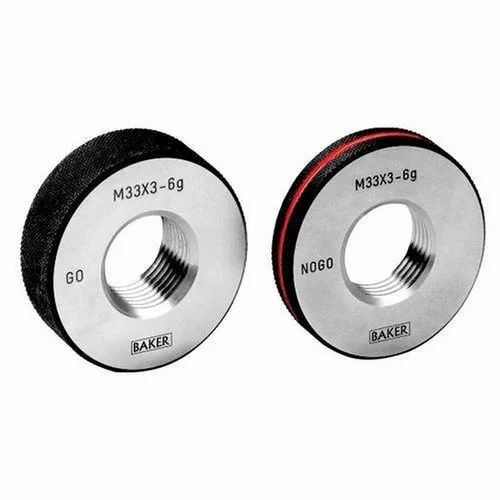
A GO ring is identified by its end marking, certificate and purchase record as the gauge that must pass over the full specified length of the external thread. A NO-GO ring has the same nominal thread size but limits excessive thread size; never substitute one for the other.
1. Read the end marking before inspection. Confirm the nominal diameter, pitch, thread form, tolerance class, GO or NO-GO designation, applicable standard, and gauge serial number against the certificate and purchase record. Quarantine the gauge if the identification is missing or illegible.
2. Clean the male thread and remove burrs from its lead without changing the thread profile. Chips, oil or a damaged first thread can stop a good ring and create a false result.
3. Align the ring squarely with the thread axis. Turn it by hand, without a wrench, hammer or extension. If it binds at the lead, stop and investigate; do not force it.
4. Apply the GO ring first. It must pass over the full specified thread length without force. Apply the NO-GO ring only to the entry limit stated on the drawing or governing standard; two turns is common, not universal.
5. Record full GO passage and the measured NO-GO entry, not merely “pass” or “fail.” Do not use either ring to chase a damaged thread or adjust a machine. Include this result in your thread ring gauge inspection and thread ring gauge maintenance records.
Use a Repeatable Inspection Sequence
A dependable thread ring gauge inspection begins only after the gauge and workpiece reach the same controlled reference temperature, normally 20 °C for dimensional metrology.
Let hot-machined parts stabilise before checking: steel expands about 11 to 12 micrometres per metre per kelvin, so a 50 mm steel dimension changing by 10 K shifts roughly 5.5 to 6 micrometres.
1. Wipe cutting fluid, chips and abrasive dust from the part and gauge with a clean, lint-free cloth. Deburr the workpiece without changing its thread profile.
2. Examine the gauge lead and flanks for embedded particles, scoring, rust, pitting or peening. A damaged lead can create a false rejection even when the thread itself is correct.
3. Place the ring squarely on the thread axis. Turn it by hand at a steady rate; do not rock it sideways, use a wrench or apply force.
4. Run the GO test before the NO-GO test unless the work instruction specifies another order.
| Test | Required action | Meaning of result |
|---|---|---|
| GO | Turn over the full specified thread length without force | Confirms the thread accepts the GO limit |
| NO-GO | Turn only to the entry limit stated by the drawing or governing standard | Confirms the thread does not exceed the rejection limit |
Record the part identification, gauge serial number, temperature condition, GO result, NO-GO entry and operator. If either the gauge or part requires force, quarantine the result and investigate contamination, misalignment, damage or a thermal difference before making an acceptance decision.
Clean and Store the Gauge Through Pune’s Monsoon
Thread ring gauge maintenance starts with removing contamination without touching the gauge’s geometry. Wipe chips and cutting fluid from the ring with a clean, lint-free cloth, then dry the thread completely. Never use abrasive paper, files, wire brushes, aggressive polishing or uncontrolled lapping; they can change pitch diameter, flank geometry, pitch or lead.
1. Apply a compatible light corrosion inhibitor approved for precision gauges. Confirm that its film will not interfere with the next inspection. If the gauge will be used soon, remove excess preservative according to the inspection procedure rather than leaving a heavy coating.
2. During Pune’s humid or monsoon weather, place the dry gauge in its case or a closed cabinet with fresh desiccant. Keep it away from wet components, chlorides, grinding dust and open cutting-fluid containers. Cap or box it after wiping.
3. Record when the gauge leaves storage and when it returns. Minimise time outside the case, especially when the gauge and shop are at different temperatures; let both stabilise before inspection.
4. Handle a thread ring gauge in Pune with clean, dry hands or suitable gloves. Never stack it against another steel tool, where the thread entry can be struck. A dent at the entry can create a false inspection result even when the remaining thread looks clean.
Set Verification Rules and Choose Support Carefully
Set the verification interval from risk, not from calendar time alone. Consider usage frequency, production volume, gauged material, contamination, past calibration drift and the consequence of accepting a defective part.
| Gauge situation | Control response | Reason |
|---|---|---|
| High-use GO ring making final product decisions | Tighten the documented verification interval | Wear can change acceptance decisions |
| Ring exposed to chips, abrasive dust or contaminated parts | Inspect before every use and verify sooner | Contamination can damage or distort results |
| Protected reference gauge with stable history | Use a longer risk-based interval | Low handling reduces wear |
| Gauge with previous calibration drift or costly failure consequences | Increase verification frequency | Historical evidence and business risk demand stronger control |
Inspect the ring visually before each use. Schedule documented verification even when it looks sound.
Use certified thread masters, a suitable thread-measuring machine or another documented method that evaluates pitch diameter and relevant thread geometry. Measuring outside diameter alone cannot prove a ring is correct.
Compare thread ring gauge suppliers by the records they provide, not by local availability. Require:
- Measured characteristics and acceptance limits
- Measurement uncertainty where applicable
- Equipment or method, verification date and relevant environmental conditions
- Traceability to national or international standards
- ISO/IEC 17025 laboratory support for critical work
A thread ring gauge suppliers for care guide in Pune should also address protective packaging and post-delivery records. Perfect Tools Centre is useful when its documentation supports that traceability.
If verification fails, tag the gauge and remove it from production. Send it to a qualified gauge specialist; workshop lapping can alter pitch diameter, pitch, flank angle, lead and entry geometry. That is thread ring gauge maintenance, not a casual repair.
Related product
 | Thread Ring Gauge A thread ring gauge is a precision tool used to check the external threads of male fasteners like screws and bolts, verifying that their diameter,... View product → |
Frequently asked questions
What should you check when accepting a thread ring gauge from a Pune supplier?
Match the supplier’s delivery note and certificate to your purchase order, including thread size, pitch, tolerance class, gauge type, identification marking and quantity. Reject or quarantine the gauge if its identity, condition or paperwork does not agree.
How do you identify GO and NO-GO thread ring gauges?
Read the permanent markings on each ring and compare them with the certificate or purchase order. Keep GO and NO-GO rings physically separated and never rely on appearance alone when markings are unclear.
What is a repeatable thread ring gauge inspection sequence?
Clean the gauge and mating thread, inspect the threads and faces for damage, confirm the marking, and use the specified inspection method without forcing the ring. Record the result, date, operator and equipment used.
How should you store a thread ring gauge during Pune’s monsoon?
Remove cutting fluid and moisture, dry the gauge fully, apply a suitable rust preventive, and store it covered in a dry cabinet. Keep it away from coolant splash, abrasive tools and rapid temperature changes.
When should a thread ring gauge be sent for verification?
Send it for verification when the calibration interval expires, the ring is dropped, corrosion or thread damage appears, inspection results become inconsistent, or its identification and certificate cannot be confirmed.